If you’re new to dash cams or are just learning about them, then you may be wondering, “How is a dash cam powered?” Don’t fret, you’ll soon have all the information about dash cams and power that you’ll ever need.
In this article you’re going to learn all the different ways to power a dash cam to include using a cigarette lighter adapter, a hardwire kit, external battery packs, secondary/house batteries, and solar panels.
The Ultimate Source of Power
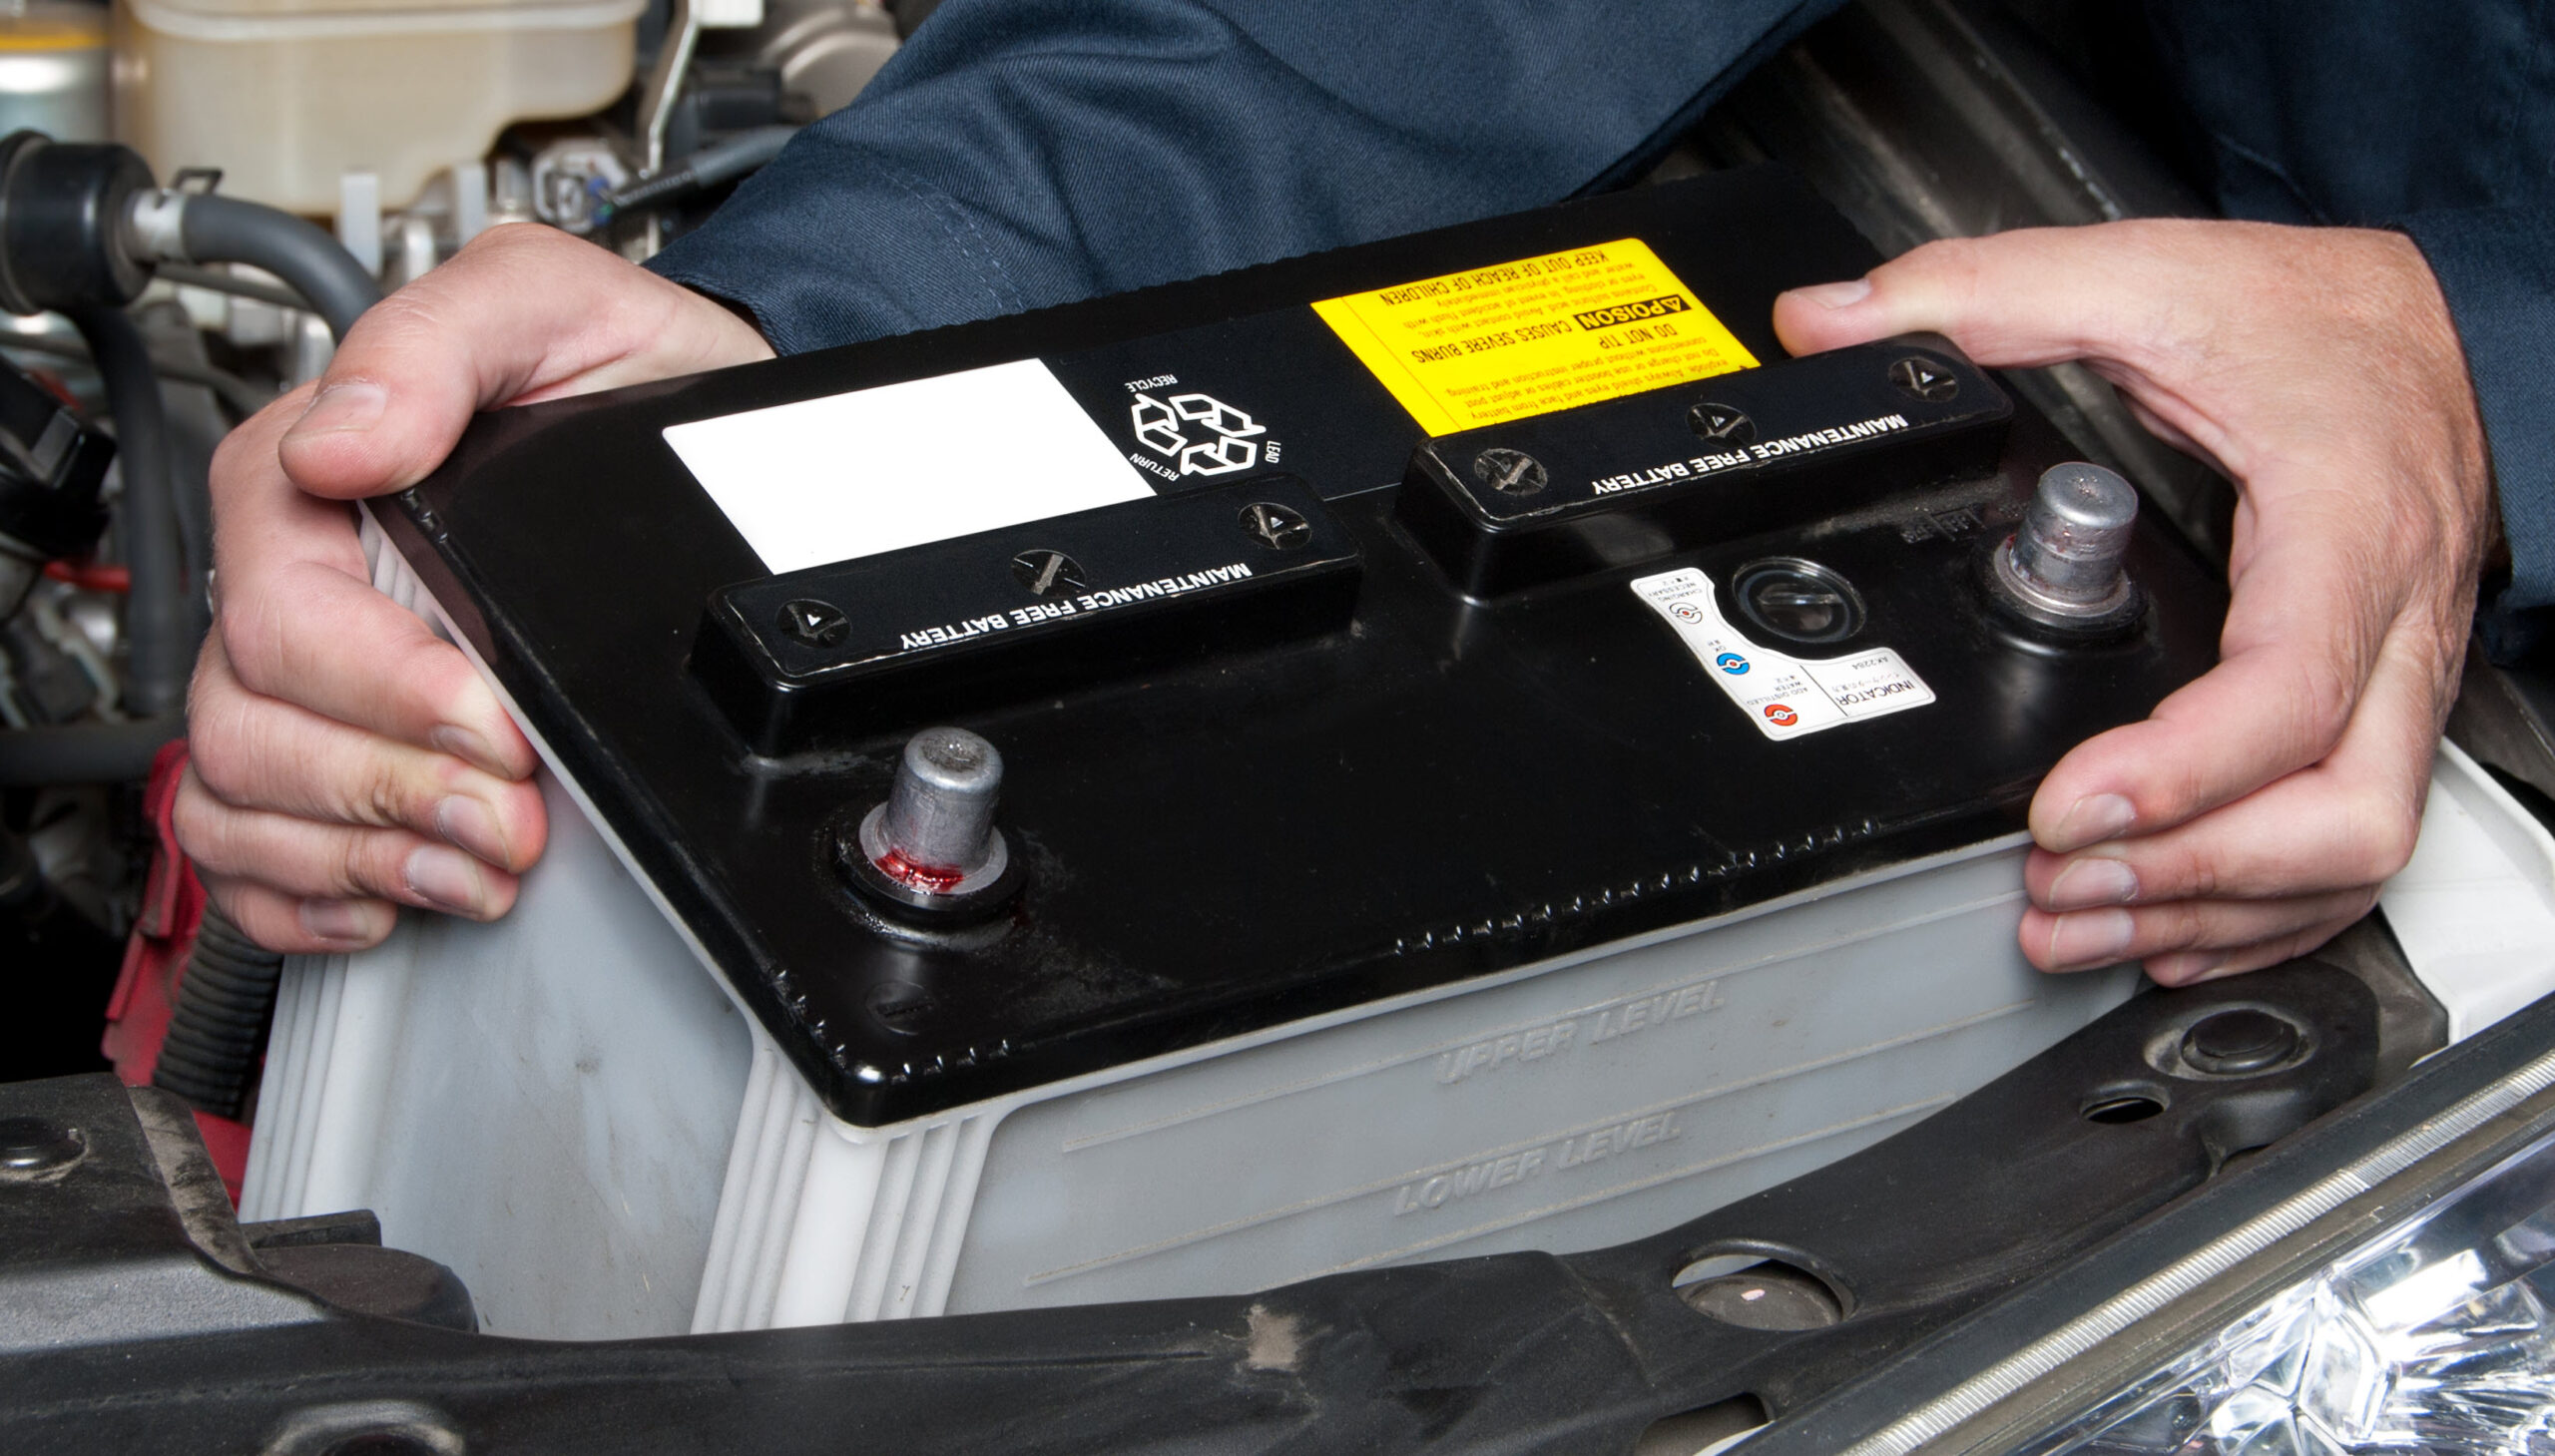
When you’re powering a dash cam, ultimately the source of power is coming from your car’s starter battery. How the power gets from your car’s starter battery to your car’s dash cam can vary quite a bit. Going forward this article will be discussing the various ways you can get power from your car’s starter battery to your car’s dash cam.
Cigarette Lighter Adapter
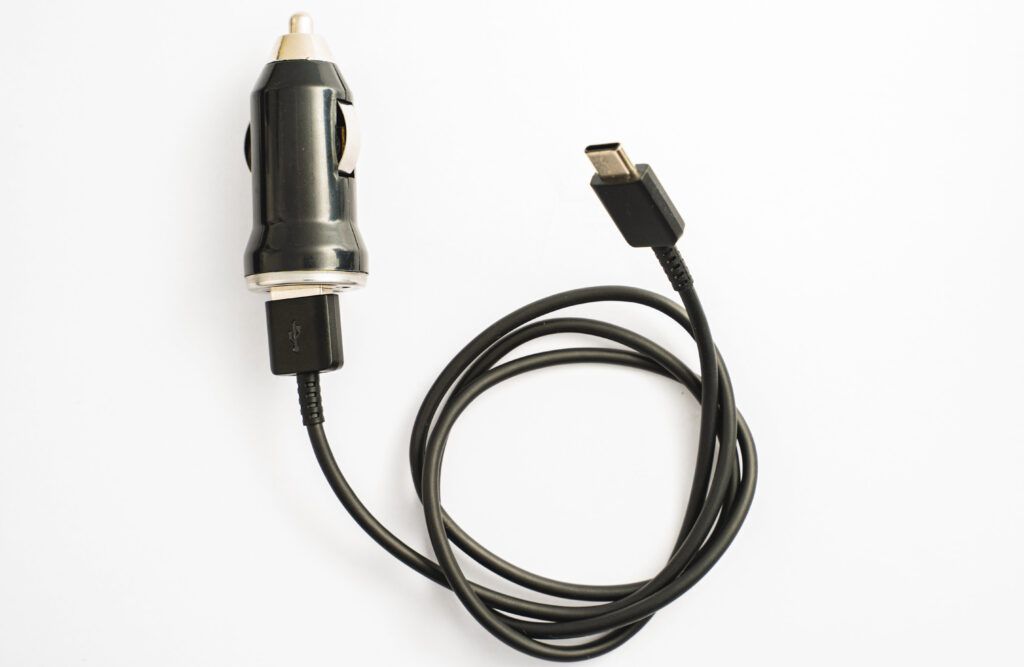 The easiest and simplest way to get power to your car’s dash cam is by using a cigarette lighter adapter. Most dash cams come with one. You simply plug the cigarette lighter adapter into your car’s car’s cigarette lighter port, run the cable to your car’s dash cam, plug the cable into the dash cam, and you’re done.
Typically your car’s car’s cigarette lighter will be tied into an accessory (ACC) circuit that is only powered when your car’s car is turned on or the ignition switch is in the “ACC” position. When you power your car’s dash cam via the cigarette lighter this means the dash cam will only be turned on when your car’s car is running.
For some people, only using the dash camera while the car is turned on is good enough for them. Their main concern is to record what is happening while they’re driving in case of an accident and not necessarily the things that are happening around their car while they’re not driving.
If you want your car’s dash cam to record while you’re not driving, then you’ll want to look into the other methods of powering your car’s dash cam.
Hardwire Kit
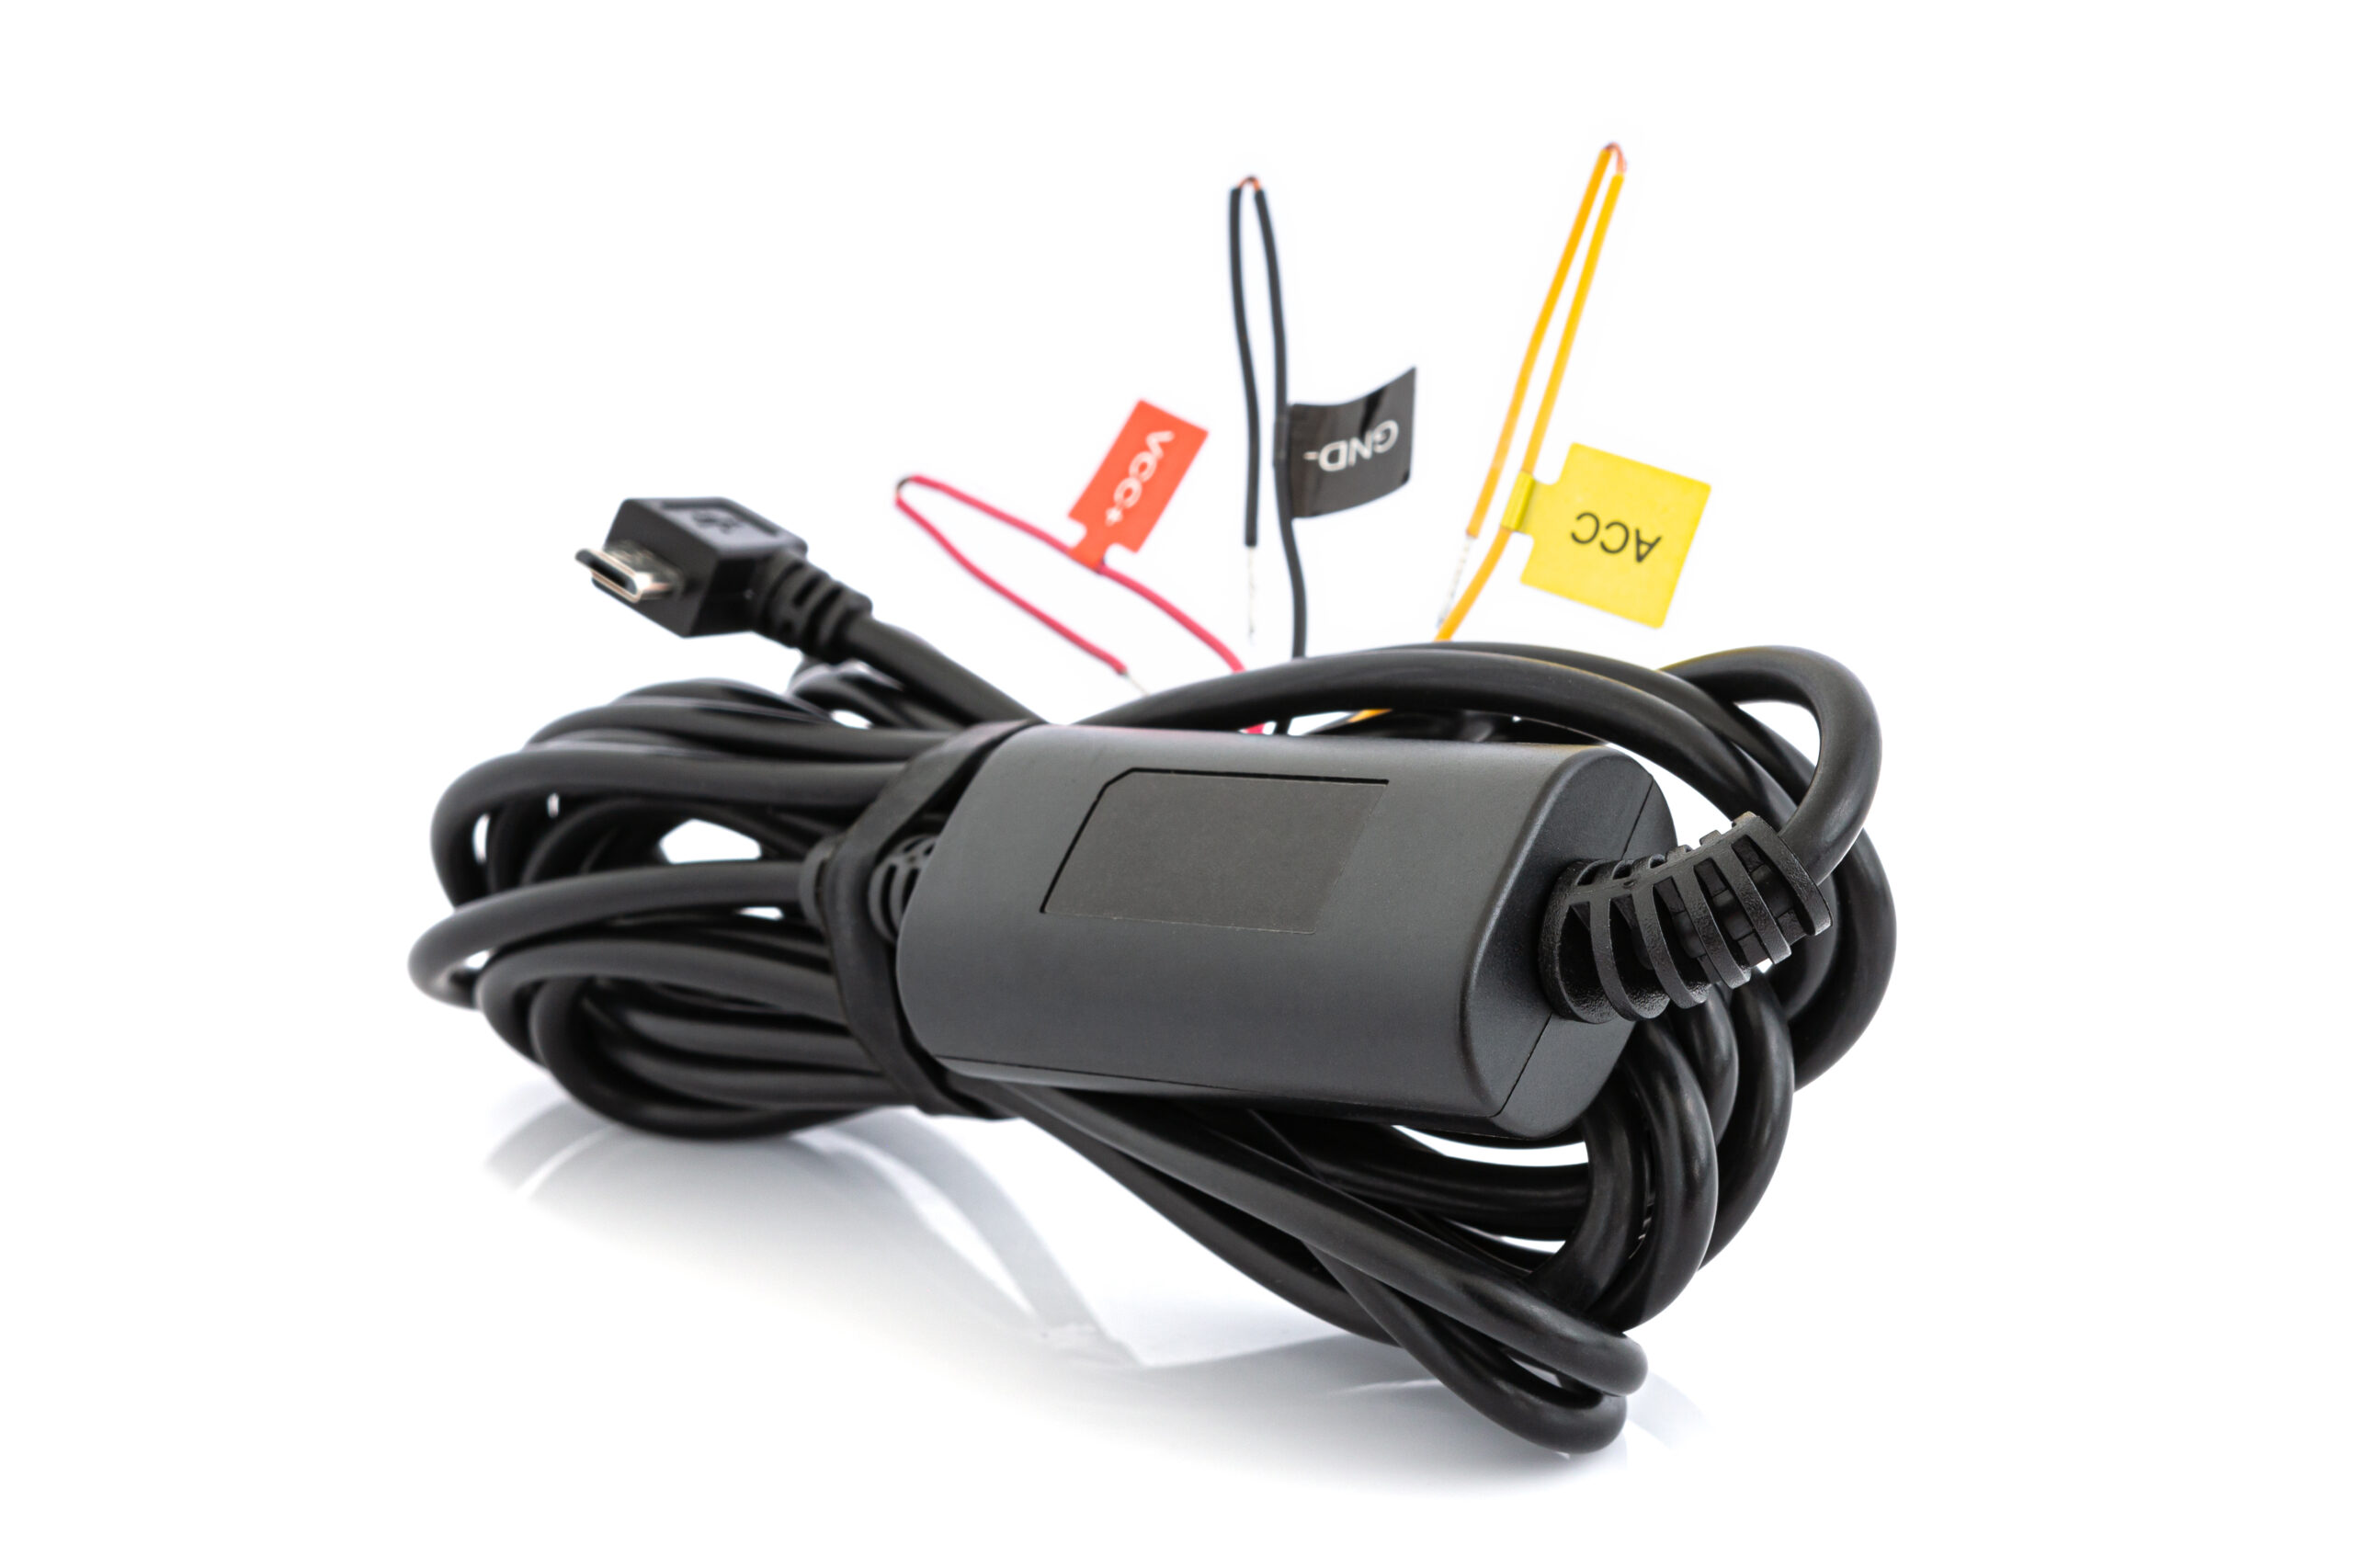
Example of a Hardwire kit
Using a hardwire kit is a bit more involved, than simply using a cigarette lighter adapter. Typically, you have to order a hardwire kit separately as they usually do not come included by default with a dash cam. Additionally, you’ll have to order fuse taps, fuses, and a set of crimpers if you do not already have them on hand.
To use a hardwire fuse kit you have to go into your car’s car’s fuse box and find two fuse slots that are either empty or contain fuses that are NOT part of critical circuits.
You need one slot that is always powered on even when your car’s car engine is turned off. This will give your car’s dash cam power to operate in Parking Mode.
You need another slot that is only powered when the car is running which is sometimes called ACC for accessory or ignition-switched. This is used by the dash cam to know when the car is running, so it will switch out of parking mode into regular mode.
This is needed because the dash cam may have different recording settings it uses in parking mode than it does while you’re driving to conserve storage space on the microSD card. Parking mode is of no use if footage gets overwritten before you return to your car’s car and notice damage, so parking mode typically uses a lower bit rate and/or resolution in an effort to store more footage before it’s forced to overwrite older footage.
Once you’ve located appropriate fuse slots, then you will need to perform the following steps:
- Remove the existing fuse, if one is present.
- Place the existing fuse into the bottom of the fuse tap.*
- Place the new fuse into the top slot of the fuse tap.*
- Crimp the cable on the fuse tap to the cable on the hardwire kit.
- Repeat as necessary for any additional cables. Typically you’ll do everything above this step twice. Once for the BATT (constant on) cable and once for the ACC (ignition switched) cable.
- Insert the fuse tap(s) into the fuse slot on your car’s fuse box.
- Attach the hardwire kit to an appropriate ground point on your car’s car.
*Note: The intent here is to place the new fuse in the slot that connects to the fuse tap cable. This is the cable that gets crimped to the hardwire kit cable. All the fuse taps I’ve seen have the cable connecting to the top slot. If your car’s fuse tap is different, then adjust accordingly.
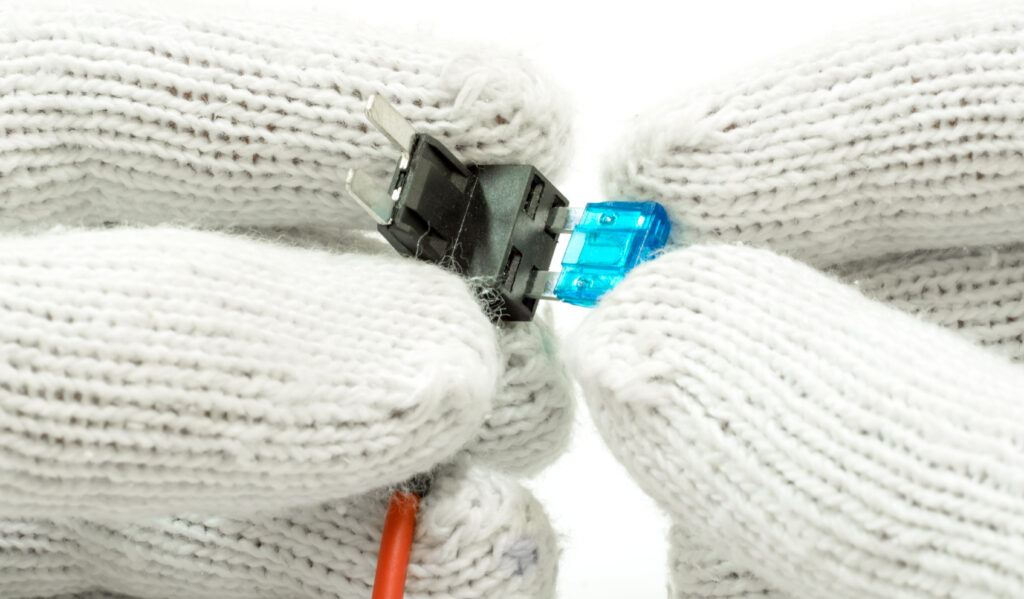
Mini Fuse Being Inserted Into Fuse Tap
This sounds like quite a bit of work and it can be intimidating, but after you’ve done the process once it’s really simple. If you really don’t want to do it yourself, then you can pay someone to do it for you. I’ve heard of people paying Best Buy, their car dealership/mechanic, and/or car audio installation shops to do this for them.
The benefit of using a hardwire kit to power your car’s dash cam is that you’re able to use a dash cam feature known as “Parking Mode”. Parking Mode allows your car’s dash cam to constantly record what is happening around your car’s car within the dash cams field of view (FOV).
If you come back to your car’s car and notice damage, then you can simply review your car’s dash cam footage to see what happened and possibly get the license plate and image of the person who caused the damage. Obviously, this is really beneficial for filing insurance claims and having the person who caused the damage pay for the damage instead of being forced to foot the bill yourself.
The Parking Mode on dash cams usually have a G-force setting. This setting will tell your car’s dash cam to lock a video recording if it detects a certain amount of force exerted on your car’s dash cam. This is useful if you have a smaller microSD card and there’s a possibility that the dash cam will start overwriting older files before you make it back to your car’s card. The G-force setting will place a lock on the file preventing the recording from being overwritten.
External Battery Packs
While hardwire kits are a step above using a cigarette lighter adapters, they do have their own limitation. A dash cam powered by a hardwire kit is limited by the power supplied by the starter battery. You don’t want your car’s dash cam to drain your car’s battery to the point where you can’t start your car’s car.
To combat this, hardwire kits come with pre-selectable voltage cutoffs that allow you to set the voltage at which you want the hardwire kit to stop supplying power to the dash cam. Typically, people recommend setting the voltage cutoff on the hardwire kit to 12.4 volts to prevent too much wear on your car’s starter battery and ensure your car’s starter battery always has enough charge to start your car’s car.
Using my own car as an example, I can usually get 15 – 16 hours of parking mode using the 12.4 voltage cutoff setting of my dash cam. If I get home from work at 5pm, then this is enough time to record until I leave for work the next day at 7am. However, if I take the day off from work, then the starter battery will only have enough juice to power my dash cam until about 8 or 9 am.
If you drive your car’s car every day without fail, then a hardwire kit is all you need. Driving your car’s car each day will recharge your car’s starter batter to give the coverage you need.
Where external batter packs shine is that they keep your car’s dash cam powered on in parking mode for far longer than you could with just your car’s starter battery. Another added benefit is they reduce the wear on your car’s starter battery, by not having your car’s dash cam constantly draw power from it.
I would say battery packs are about the same complexity or slightly less complicated than a hardwire kit. You just follow the instructions from the manufacturer and you’re good to know.
One tricky thing about external battery packs is you do have to find a place to put them. This could be as simple as under the driver or passenger seat. However, this means you have to run cables from the external battery pack to the dash cam and to the fuse box. The cable to the fuse box is to allow the battery pack to be charged while your car’s car is running.
You can purchase pre-made battery packs or try to build one yourself if you’re adventurous. The min downside to the pre-made battery packs is that they tend to be pretty expensive for the amp-hours they provide. However, for a lot of people this expense is worth it for the relative ease of use and to provide extended parking mode coverage beyond what their starter battery could provide.
Secondary/House Battery
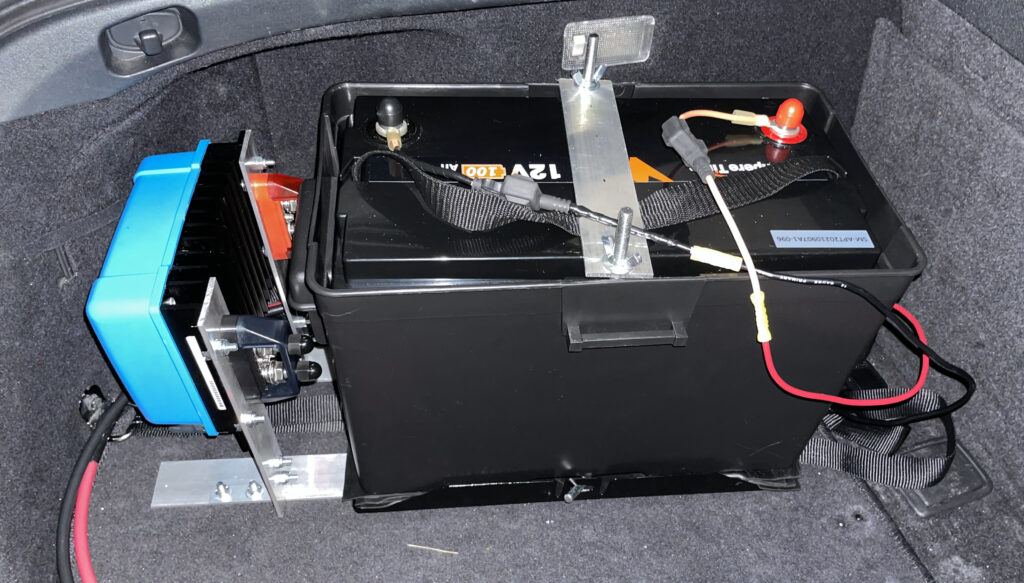
My secondary/house 100Ah battery install in my car with Victron charger
Now we’re getting into the really complicated stuff. As I mentioned above, the external battery packs that are on the market today are really expensive for the amount of amp-hours they provide. You can get much more amp-hours per dollar by purchasing a larger battery and wiring your car’s dash cam to it.
There are drawbacks to this method though. The main drawback is you have to find a way to charge this battery. There are DC-DC chargers you can use to draw power from your car’s car’s starter battery, but this involves running a fairly thick cable, 6AWG to 8AWG, from the place where you have your car’s secondary/house battery and DC-DC charger to the starter battery.
To go along with running the cable, you also need to purchase all the tools and connectors to terminate and crimp the thick power cable appropriately. Also, you have to find a way to mount the secondary/house battery so it’s secure and doesn’t become a projectile in the event of an accident.
This definitely eats into the cost savings a bit, but when I did the install on my car I calculated I was getting eight times the power for only four times the cost. My goal was able to have my dash cam in parking mode for at least a week without driving my car to recharge the battery since I was working every other week in the office.
If you don’t drive your car’s car infrequently, then this setup is great for keeping parking mode running on your car’s dash cam for long periods of time at a cost cheaper than if you were to just use a bunch of external battery packs.
It’s still not set and forget as you still need to check on your car’s car periodically before the dash cam starts overwriting the old recording files, but it’s a lot easier to go out and spend a few minutes swapping out a memory car or checking your car’s car for damage, than driving around for 15 – 30 minutes to recharge your car’s starter battery.
There are a few down sides to this method.
First, you’ll need to find somewhere in your car’s car to store the secondary/house battery. This means you have to give up some storage space.
Second, you’ll still need to drive your car’s car to recharge this secondary battery or you’ll need to remove it from your car’s car and charge in your car’s house. In my case, I was able to charge the secondary battery just by driving to work on the weeks I went into the office. This provided enough charge to get me through the next week when I didn’t have to go into the office.
If you didn’t want to go through the hassle of setting up a method to recharge the secondary battery by driving around, then you a good compromise is to just buy two batteries and swap them out. When the battery in the car gets low, then you can swap it out with a battery that your car’s charged in your car’s house.
This is a little extra work, but you can save quite a bit of money on the tools and materials needed to recharge the secondary battery by driving around in your car’s car.
Solar Panel
This really goes along with using a secondary/house battery. I’ve seen some discussions of using solar panels in their car to charge a battery which powers the dash cam. Everything I’ve read points to the solar panels not producing a lot of power when they’re placed behind glass in your car’s car. I personally haven’t tried this method as the secondary/house battery method provided me with more than enough power for my use case.
Conclusion
As you can see, there are many ways to power a dash cam. The way you choose to power your car’s dash cam will mainly depend on if you need or want to choose parking mode and how long you need parking mode to be active on your car’s dash cam.
To summarize:
- If you don’t need parking mode, then using a cigarette lighter adapter will be the simplest and best route for you to take.
- If you drive your car’s car each day and need/want to use parking mode, then a hardwire kit is your car’s best option.
- If you need parking mode for more than 15 hours or don’t want wear and tear on your car’s starter battery, then an external battery pack is best for you.
- If you need parking mode for more than 1 or 2 days, then you may want to look at installing a secondary/house battery to get the most bang for your car’s bucks in regard to amp-hours/dollar as external battery packs can get quite expensive.
I hope you’ve learned a lot from this article. Please feel free to leave any questions or comments below and I’ll be sure to answer them.